
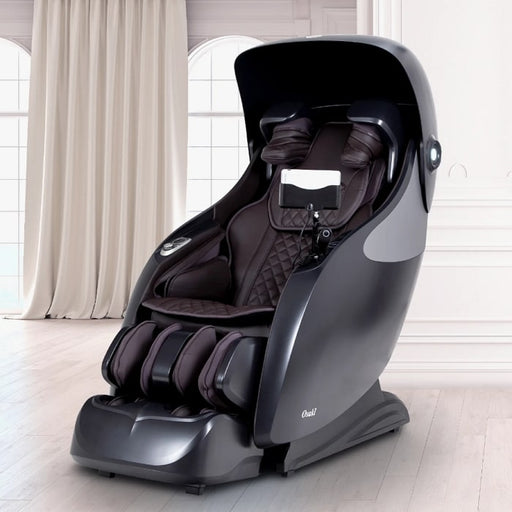
An Osaki massage chair manual is the best reference for your chair’s exact buttons, error messages, installation measurements, and maintenance requirements. Osaki sells many chair models with different roller tracks, remote layouts, zero-gravity positions, voice controls, footrest systems, and electrical requirements, so instructions are not always interchangeable.
This guide explains the setup and everyday operating steps that apply to most Osaki massage chairs, along with safe ways to check common problems. Use it alongside the model-specific manual supplied with your chair, especially before moving the chair, opening service panels, or responding to a displayed fault code.
A massage chair can support relaxation and temporary comfort, but it is not a substitute for medical diagnosis or treatment. If you have a medical condition, recent surgery, an implanted medical device, are pregnant, or are unsure whether massage is appropriate, ask a qualified healthcare professional before use.
Find the Correct Manual for Your Osaki Chair
Before following a setup diagram or troubleshooting instruction, identify the chair’s complete model name or model number. Osaki manuals can look similar while referring to different wiring layouts, remote controls, or chair dimensions.
Look for the model information in places such as:
- A label on the rear or underside of the chair base
- The shipping carton or purchase paperwork
- A label near the power inlet or main power switch
- The remote-control label or initial startup screen
When searching for an Osaki massage chair manual, include the full model designation rather than searching only by a collection name or retailer listing. If the manual is missing, contact the seller or Osaki support with the model number and, if requested, the serial number. Do not rely on a manual for a visually similar chair.
Prepare the Room Before Delivery or Assembly
Massage chairs are large, heavy, and designed to move through a controlled recline path. Preparing the room first prevents a common problem: placing the chair against a wall, then finding that it cannot recline safely.
Choose a suitable location
Place the chair on a level, stable floor close enough to a grounded electrical outlet that you do not need an extension cord. Keep it indoors in a dry area away from direct moisture, heat sources, and prolonged strong sunlight. Heat and sunlight can dry or fade upholstery over time, while moisture can damage electronic components.
Check the model-specific manual for the required wall clearance. Some Osaki chairs use a space-saving forward-slide design, which reduces the distance needed behind the chair as it reclines. That does not mean no clearance is needed. The footrest, backrest, arm sections, and moving base may still require open space.
Measure the access route
Measure doorways, halls, corners, elevators, and stair landings before delivery. Compare these measurements with the chair’s packaged and assembled dimensions in its manual or product documentation. A chair that fits in the room may not fit through the path leading to it.
Clear rugs, low tables, pet beds, cables, and breakable items from the chair’s operating area. Objects under the footrest or behind the backrest can obstruct movement and may trigger a safety stop or cause damage.
Plan for safe lifting
Do not try to lift a massage chair alone. The center of gravity can shift, especially when lifting the back section or moving across thresholds. Follow the delivery and assembly guidance for your model. If a chair must be tilted or moved, hold it by approved structural areas rather than the armrests, legrest, remote holder, upholstery, or moving mechanisms.
Initial Setup and Assembly Basics
Many Osaki massage chairs arrive partly assembled. Depending on the model, setup may involve attaching the side panels, arm assemblies, footrest, remote holder, head pillow, or other trim pieces. Keep all packaging until you confirm that the chair powers on and every function works correctly.
Inspect the chair before connecting power
Before assembly, inspect the upholstery, cables, connectors, remote, and visible mechanical parts. Report shipping damage before operating the chair. Do not power on a chair with a pinched cable, cracked connector, exposed wire, loose plug, or noticeable fluid damage.
During assembly, connect only the plugs intended for the matching ports. Electrical connectors are often shaped or labeled to prevent incorrect connections. Never force a plug. If it does not insert smoothly, stop and compare the connector labels and orientation with the instructions for your model.
Check cables and moving parts
- Route cables so they are not trapped under the chair or pinched between metal parts.
- Confirm that the footrest and backrest can move without contacting furniture or walls.
- Make sure packaging blocks, ties, and protective foam are fully removed.
- Install cushions, pads, and the head pillow as directed, without covering vents or mechanical openings.
- Keep the remote cable free from the recline mechanism and away from the floor where it could be caught.
Some models include removable intensity pads or back cushions. These can soften the feeling of the rollers, but they should be used only as intended. Do not add thick blankets, loose cushions, or improvised padding inside the chair, as they can affect fit, airflow, and massage contact.
Connect power safely
Turn the chair’s main power switch off before plugging it in. Connect the power cord directly to a properly grounded wall outlet that matches the electrical specifications listed on the chair’s label and in its manual. Avoid overloaded outlets, damaged power strips, and extension cords unless the manufacturer specifically approves their use.
After connecting power, turn on the main switch, then use the remote’s power button to start the chair. The first startup may cause the chair to adjust its position or run a brief initialization sequence. Keep people, pets, and objects away from all moving sections while this happens.
Understand the Main Controls
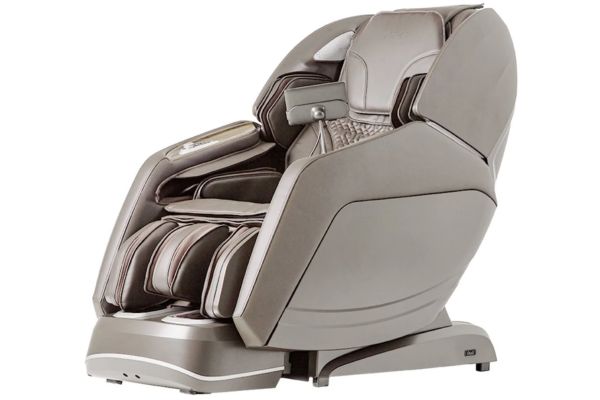
Remote layouts differ by model, but most Osaki chairs use the same basic control groups. The labels, icons, and available programs may vary, so treat the remote’s display and model manual as the final authority.
| Control group | What it usually does | Practical use |
|---|---|---|
| Power | Starts or stops a massage session | Use it to wake the chair and end a program. The chair may return to an upright position after shutdown. |
| Auto programs | Runs a preset sequence of massage techniques and positions | Choose one when you want a guided session rather than manual adjustments. |
| Manual massage | Selects techniques, zones, speed, width, or roller position | Use it to focus on a preferred area and fine-tune intensity. |
| Recline and zero gravity | Moves the backrest and legrest into reclined positions | Adjust gradually and make sure the chair has enough clear space. |
| Air massage | Controls airbags in areas such as shoulders, arms, hips, calves, or feet | Lower the setting if compression feels uncomfortably tight. |
| Heat | Activates available warming zones | Use according to the chair’s settings and stop if the warmth feels excessive. |
| Footrest adjustment | Extends, retracts, or adjusts the leg section on applicable models | Set it so your feet rest naturally without forcing your knees or ankles. |
Credit: primemassagechairs.com
Start with a gentle program
For a first session, sit fully back with your hips positioned near the rear of the seat and your feet placed correctly in the foot wells or on the footrest. Select a short, low-intensity automatic program if available. This gives you time to assess the roller pressure, air compression, and recline position.
Body scanning is common on many models. During the scan, the chair estimates your shoulder position and body shape so the rollers can follow a more suitable path. If the rollers feel too high, too low, or uneven, use the shoulder-position controls if your remote provides them. Repositioning yourself before restarting the scan can also help.
Adjust intensity in the right order
If the massage feels too strong, do not assume the chair is malfunctioning. First reduce the roller intensity, air intensity, or speed through the remote. Next, add the model-approved comfort pad or adjust the head pillow if your manual permits it. Shorter sessions and gentler programs are often more comfortable than immediately choosing a deeper technique.
Stop the massage if you feel sharp pain, numbness, dizziness, nausea, unusual discomfort, or excessive pressure. A stronger setting is not automatically a better setting.
Use Recline, Footrest, and Body Scan Features Safely
Recline and zero-gravity functions can improve comfort by distributing body weight differently, but they also create the greatest risk of contact with walls, furniture, pets, or small objects. Before reclining, look behind and beneath the chair. Never allow children to play on, under, or around a moving massage chair.
Recline position
Move slowly into a reclined position and stop if your knees, ankles, shoulders, or lower back feel strained. A well-fitted position should support you without forcing your body into an uncomfortable angle. If the footrest is too short or too long for you, use its adjustment control where available rather than pushing against the mechanism.
Calf and foot massage
Foot rollers, airbags, and calf compression can feel intense, particularly for new users or people with sensitive feet. Wear thin socks if that improves comfort, provided the model’s instructions do not say otherwise. Avoid placing hard objects, footwear with debris, or wet feet into the footrest.
Clean feet and empty pockets also help protect the upholstery and internal mechanisms. Small items such as coins, keys, hair clips, and charging cables can fall into gaps and interfere with moving parts.
Osaki Massage Chair Error Checks and Basic Troubleshooting
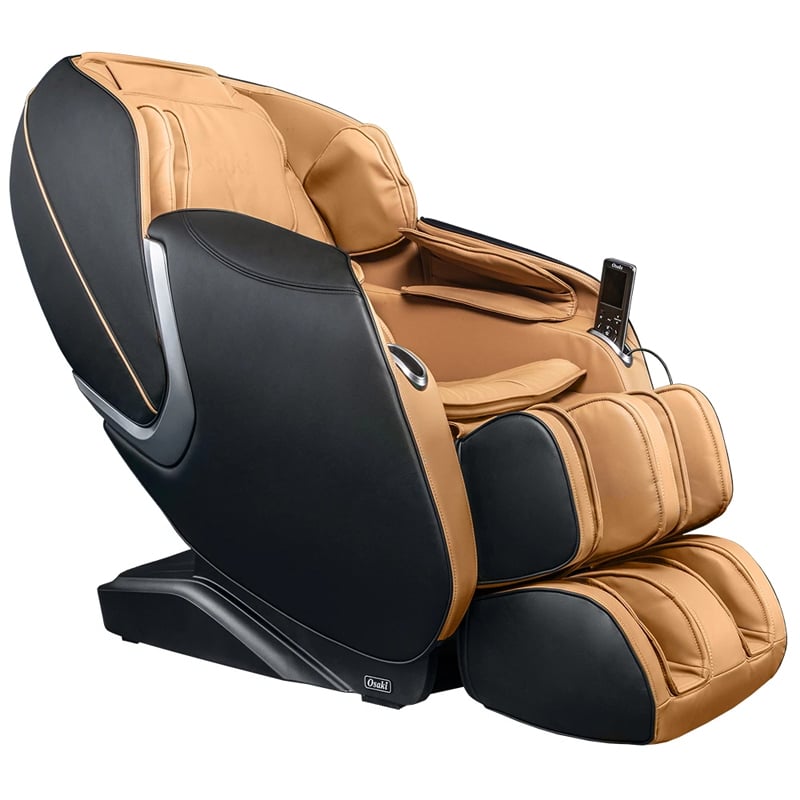
When an Osaki chair does not operate normally, begin with simple checks before assuming there is a major fault. Do not dismantle the chair, bypass safety features, or attempt electrical repairs. Internal components can retain electrical hazards and may require authorized service.
Credit: massagechairdeals.com
The chair will not turn on
- Confirm that the power cord is fully connected to both the chair and wall outlet, if your model uses a detachable cord.
- Check that the chair’s main power switch is in the on position.
- Test the wall outlet with another known-working device, if safe to do so.
- Inspect the cord and plug for visible damage. Do not use a damaged cord.
- Check whether a household circuit breaker or ground-fault outlet has tripped.
- Turn the main power switch off, wait briefly, then restart the chair.
If the remote display stays blank but the outlet and switch are working, check whether the remote connector has come loose during assembly or moving. Reconnect it only as described in the model manual and with power switched off.
The chair stops while reclining or extending the footrest
First look for an obstruction. Remove objects from behind, beneath, and around the chair, including rugs that have bunched under the base. Make sure no cable is caught in a hinge or track. Turn the chair off, wait, then restart it and try returning it to a neutral position.
Do not force the footrest by hand or sit on it while it is moving. If the mechanism repeatedly stops with nothing in its path, discontinue use and arrange service.
The rollers feel misaligned or stop in the wrong place
Improper body position can make rollers feel misaligned. Sit back evenly, keep your hips against the rear of the seat, and restart the body scan. Use shoulder-height adjustment controls if included on your remote.
If the rollers make grinding, knocking, scraping, or unusually loud mechanical sounds, stop using the chair. Normal motor and air-pump sounds are expected, but new harsh noises or repeated clicking may indicate a mechanical issue that needs professional inspection.
An error message or code appears
Error codes are model-specific. Record the exact message or code, note what the chair was doing when it appeared, and turn the chair off using the normal controls. If the manual gives a reset procedure, follow it exactly. If the code returns after a reset, do not keep restarting the chair repeatedly.
When contacting support or a service provider, have the following ready:
- Full model and serial number
- The exact code or message shown
- A description of the affected function
- Whether the issue began after moving, assembly, a power interruption, or normal use
- Clear photos or video of visible damage, if requested
When to stop using the chair immediately
Disconnect power and seek qualified service if you notice a burning smell, smoke, sparking, leaking fluid, electric shock sensation, damaged wiring, repeated breaker trips, or a mechanism that moves unpredictably. Do not continue using the chair “just to test it.”
Routine Cleaning and Care
Regular care helps preserve upholstery, keeps the remote readable, and reduces the chance that dirt or loose items enter moving areas. Always switch off and unplug the chair before cleaning.
Clean upholstery gently
Use a soft, dry cloth for routine dusting. For small marks, use a lightly damp cloth with mild soap if the material-care instructions allow it, then wipe again with a clean damp cloth and dry thoroughly. Avoid soaking seams, zippers, remote controls, and openings around airbags or rollers.
Do not use bleach, abrasive pads, strong solvents, alcohol-heavy cleaners, furniture polish, or harsh disinfectants unless the manufacturer specifically approves them for the chair’s upholstery. These products can discolor, crack, stiffen, or weaken synthetic leather and other coverings.
Protect the remote and controls
Wipe the remote with a soft, barely damp cloth rather than spraying liquid directly onto it. Keep drinks away from the control panel, USB ports, wireless charging areas, and remote holder. If liquid enters an electrical component, unplug the chair and contact service rather than attempting to dry it with heat.
Inspect the chair periodically
Every so often, inspect the power cord, plug, remote cable, upholstery seams, footrest area, and space behind the chair. Look for wear, trapped debris, loose fasteners, or changes in movement. A quick inspection is especially useful after relocating the chair or after children or pets have been near it.
Avoid storing the chair in a damp garage, unheated shed, or direct-sun area. If the chair will not be used for an extended period, switch it off, unplug it, clean it, and protect it from dust without sealing moisture against the upholstery.
Make Each Session More Comfortable
Correct setup is only part of getting a useful massage experience. Fit and moderation matter as much as the chair’s program selection.
- Begin with lower intensity and shorter sessions, especially if you are new to massage chairs.
- Use the head pillow or comfort pad if roller pressure at the neck and upper back is too strong.
- Adjust the footrest to your leg length instead of bracing your legs against it.
- Choose targeted manual settings only after you understand how the chair feels in an automatic program.
- Allow the chair to complete its normal return movement before getting out.
- Do not use the chair while sleeping, intoxicated, or unable to feel pressure and discomfort reliably.
If multiple people use the chair, each person may need different settings. A program that feels gentle for one user may feel too intense for another due to body size, sensitivity, posture, or the chair’s shoulder scan result.
Credit: primemassagechairs.com
FAQ
Where can I find the model number on an Osaki massage chair?
The model number is commonly printed on a product label on the back, underside, base, or near the power connection. Check the original invoice and carton label as well. Use the complete model name or number when requesting documentation or service.
Can I plug an Osaki massage chair into a power strip?
It is generally safer to use a properly grounded wall outlet, unless your chair’s documentation specifically permits another arrangement. Massage chairs draw electrical power through motors, heaters, and air pumps, so overloaded strips and extension cords can create avoidable risk.
Why does my massage chair make air-pump noises during a session?
A humming or pumping sound can be normal when airbags inflate and release. Concern is more appropriate if you hear new grinding, loud repeated knocking, scraping, or if the noise occurs with a loss of function. In that case, stop use and consult the model manual or service provider.
How often should I clean my Osaki massage chair?
Light dusting and wiping can be done as needed, particularly on touch points such as armrests, the remote, and foot areas. Perform a more careful inspection and cleaning when dirt builds up, after a spill, or after moving the chair. Always unplug it before cleaning.
Can two people use the chair at the same time?
No. A massage chair is designed for one seated user at a time. Do not allow anyone to sit on the armrests, footrest, backrest, or another person’s lap while the chair is operating or stationary.